Feeds:
Posts
Comments

Archive for the ‘Bread and Buns’ Category

IMG_3871

Italian Herb Focaccia

IMG_3873

Italian Herb Focaccia

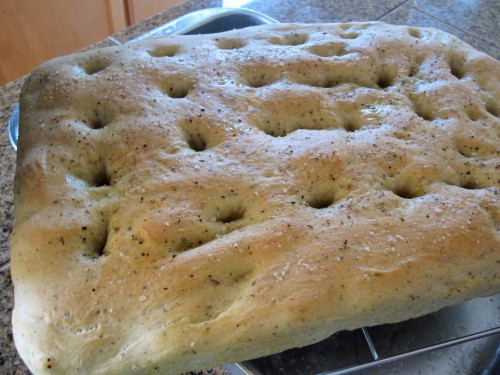
I haven’t made focaccia for a very long time. This delicious flat bread can be baked in a shallow pan, which will yield a little more height, more interior crumb for dipping in EVOO. It can also be baked free form, directly on baking stone– it may not be as tall as ones baked in a pan, but more crusty for sure. Well, how to have the best of both worlds?

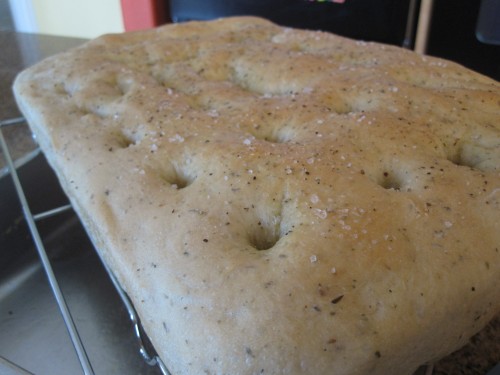
The magic is baking in a pan, AND in a high temperature oven (425°F–450°F, preheated at least 20 minutes), use baking stone (for even heat distributing) and water sprays (to create a baking environment similar to brick oven, producing crunchy crust). My focaccia this time turned out awesome. I think it was the best focaccia I’ve ever had (including store bought and restaurants)~ crusty with every bite, yet the interior crumb is very soft and fluffy for dipping in extra virgin olive oil, not to mention the wonderful aroma from the herbs.

I used Zojirushi bread maker to knead the dough as my KitchenAid stand mixer was dying on me. This is a relatively easy recipe because the ingredients are simple and the machine does all the hard work. It’s so easy that I think I will have my kids made the bread next time.

Italian Herb Focaccia Recipe (makes 1 large 9″ x 13″ loaf)

Ingredients:
1 cup warm water
3 tbsp olive oil
3 cups bread flour
2 tsp dry yeast
2 tsp salt
3 tsp dried Italian seasoning mix

Method (using Zojirushi bread maker for dough kneading):

  1. Add water and olive oil at the bottom of breadmaker loaf pan. Then add bread flour, covering the liquid. Make a indentation in the center and add yeast to the ndentation. Put salt and Italian seasoning mix at different corner. Select “DOUGH” course and press “START”.
  2. When the course finishes all cycles, remove dough to a greased large bowl. Cover bowl and rest in a warm place until the dough doubles in size. Meanwhile grease a 9″x13″ shallow pan with 1 tbsp olive oil.
  3. Remove dough from the bowl to a lightly floured surface. Punch down the dough and stretch out slightly. Transfer to greased baking pan, stretch out the dough with fingers to cover the bottom of the pan. Cover pan with plastic wrap, rest in a warm place until the dough doubles the height.
  4. Preheat oven to 425°F (at least 20 minutes) with baking stone positioned on upper 1/3 rack. Fill a spray bottle with some water.
  5. Drizzle 2 tbsp olive oil on top of the bread, then make dimples, 2 inches apart, with your finger. Sprinkle some ground black pepper and kosher salt on top.
  6. Quickly spray water to oven walls, about 2-3 spray per side. Do it quick before the oven loses its heat. Place baking pan and dough on baking stone. Bake for 15-18 minutes, until the top is golden and crusty. Remove focaccia from the pan and cool on a rack.

Regina’s Note:

  • Dough rise: after Zojirushi finishes its dough course (including rise cycles), I took the dough out and rest dough in a bowl until it doubles in size. 2nd rest in greased baking pan is double in height– it takes a longer time but I think it makes very soft fluffy interior crumb.
  • Leftover focaccia can be frozen. Just wrap up tightly and placed inside an air-tight ziplock bag. When ready to serve, thaw in fridge slowly then fresh it up in the oven.
Read Full Post »

IMG_3787

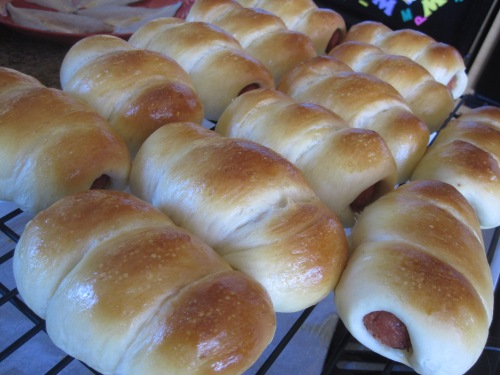
Zojirushi BM: Hot Dog Buns

As my KitchenAid stand mixer recently dying on me on bread dough kneading, my hubby got me this bread machine for me this past Christmas. Oh how very sweet of him!!

Back then when I decided to buy a stand mixer instead of a bread machine because I thought stand mixer is more versatile– it can handle mixing, whipping and dough kneading. Bread machine is only for making bread (not to mention its big bulky size)… well, now I change my thinking– bread machine is called “bread machine” for a reason~ I have tried bread from a bread machine vs. stand mixer. And let me tell you that bread from bread machine has a softer texture. The other thing is, at least I don’t have to worry about the weird sound coming from the stand mixer while kneading the dough, nor do I have to worry the burning smell (and little smoke coming out of the accessory attachment hole!) from the overheated motor. Yes, it’s bulky, but it’s much much lighter my Kitchen Aid stand mixer, and much much quieter! I am now worry free when I make breads~ I can do other chores without checking on it every now and then, take long showers, go shopping… okay, enough talking here. Time to get to work!

Zojirushi Bread Machine: Hot Dog Buns Recipe (makes 16 buns)

Ingredients:
3/4 cup luke warm water
1 egg– beaten
3 cups bread flour
2 1/2 tbsp dry milk powder
4 tbsp sugar
1/2 tsp salt
2 tsp dry yeast
3 tbsp unsalted butter– cut into pieces

8 bun-length hot dogs

egg wash

Method (using Zojirushi bread maker for kneading):

  1. Combine bread flour, milk powder, sugar and salt. Add water and beaten egg to the bottom of bread machine loaf pan. Carefully add in flour mixture (to cover the liquid in the loaf pan).
  2. Make a small well/ indentation on top of flour mixture, add dry yeast to the indentation. Scatter butter pieces around the yeast. Select course to “REGULAR/DOUGH” and press “START”.
  3. Meanwhile, blanch hot dogs in boiling water for a few minutes to wash down the salt. Drain and pat dry. Cut hot dogs in half across the length to make 16 pieces. Cool completely.
  4. When machine finishes kneading the dough, remove dough from machine loaf pan and place in a large bowl. Cover with plastic wrap and rest on a warm surface (I used double-boiler method– place bowl on top of a slightly small pot filled with hot water at the bottom, rest the pot on a kitchen towel on the table) for 30-45 minutes.
  5. Divide dough into 16 portions, pull each portion to 12 inches long sticks (like making bread sticks). Wrap the dough around 1 hot dog pieces, pinching both ends to seal tightly. Place on baking pan with sealed side facing down. Repeat with remaining dough and hot dogs.
  6. Cover the hot dog buns with plastic wrap. Let hot dog buns rest in a warm place until it doubles in size. Alternatively, you can also let the buns rise slowly in the fridge overnight, bring to room temperature the next day before baking. Apply egg wash and bake at preheated 350°F oven for 15-18 minutes or until the top is golden brown.

Read Full Post »

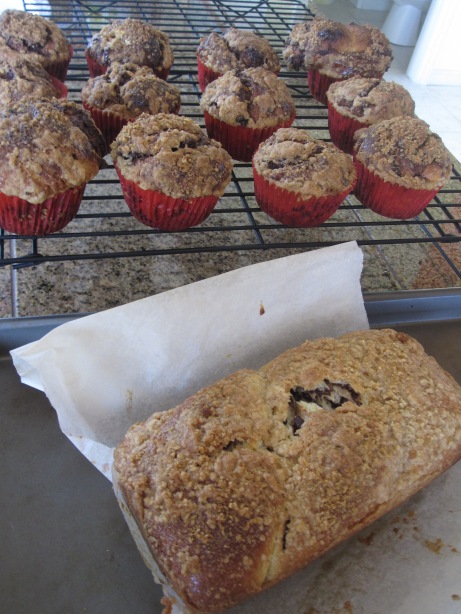
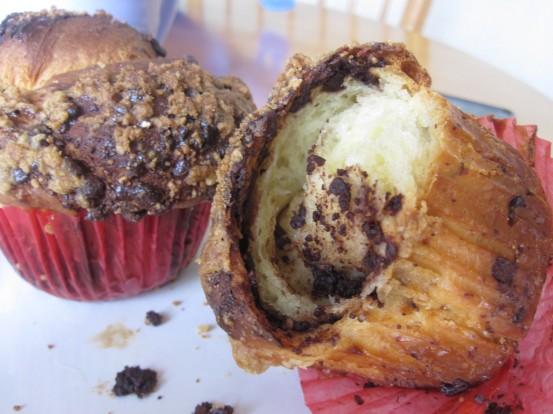
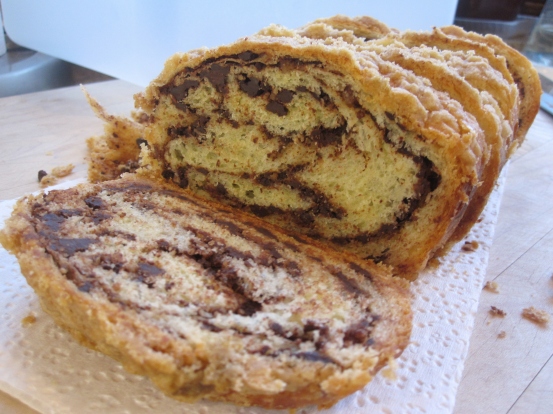
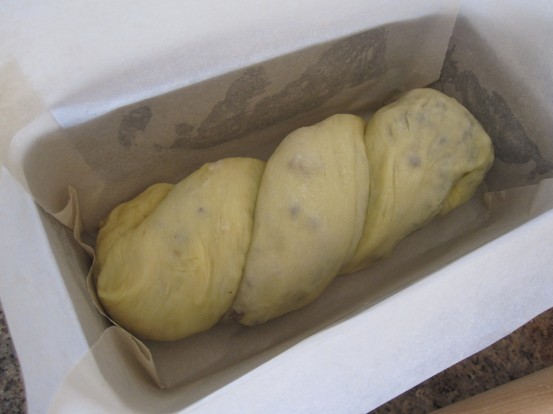
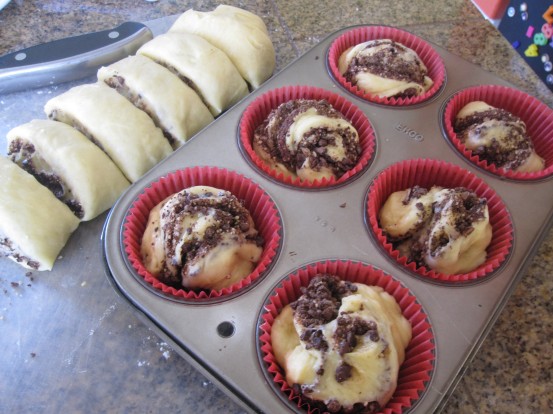
Never have I had a chocolate babka before until one of the parents in MERC Chinese School gave me one to try– and man, that was GOOD! I searched online about this bread, and found out it is a Jewish Easter bread filled mostly with bittersweet chocolate. Well, I am not a Jewish, but I made this bread for Easter Sunday’s breakfast. A lot of butter was used making babka, to a point that when I remove the bread from loaf pan/muffin pans I see there’s lots oil at the bottom of the pans (I used non-stick pans and I didn’t spray!) Luckily we don’t eat babka on a regular basis. Despite that, the bread is very rich and chocolatey. Chocolate babka is best when enjoyed fresh hot from the oven– as the streusel topping is crunchy while the bread is buttery soft, moist and chocolatey. Since only bittersweet chocolate is used, the babka doesn’t taste awfully sweet at all, just the way I like it. It’s not that difficult to make. Try it, my friend; your Easter baking will never be the same… 🙂

Chocolate Babka

Chocolate Babka

Chocolate Babka

Chocolate Babka

Chocolate Babka

Chocolate Babka

Chocolate Babka Recipe (makes 1 loaf and 12 muffin size pieces– adapted from Epicurious.com)

Ingredients:
For dough:
3/4 cup warm milk
1/2 cup plus 2 teaspoons sugar
3 tsp yeast
3 1/4 cups flour, plus extra for dusting
2 eggs
1 egg yolk
1 tsp vanilla extract
3/4 tsp salt
10 tbsp (1 1/4 stick) unsalted butter, cut into pieces and softened

For egg wash (mix well):
1 egg yolk
1 tbsp heavy cream or whole milk

For chocolate filling (mix together):
5 tbsp unsalted butter, very well softened
8 oz bittersweet chocolate, finely chopped– see note below
4 tbsp almond meals– toast in dry frying pan on low heat until pale golden, cool
1 tbsp candied orange peel– finely chopped

unsweetened cocoa powder

For streusel topping (combine flour and sugar, then cut in butter using a fork or butter knife until it resembles crumbs):
1/2 cup flour
1/2 cup packed brown sugar
1/4 cup (4oz, 1 stick) unsealed butter (room temperature)– cut into small pieces

Method:

  1. To make dough: Stir together warm milk and 2 teaspoons sugar in bowl of mixer. Stir in yeast and let stand until foamy, about 5-8 minutes. (If yeast doesn’t foam, discard and start over with new yeast.)
  2. Add 1/2 cup flour to yeast mixture and beat at medium speed until combined. Add whole eggs, yolk, vanilla, salt, and remaining 1/2 cup sugar and beat until combined. Reduce speed to low, then mix in remaining 2 3/4 cups flour, about 1/2 cup at a time. Increase speed to medium, then beat in butter, a few pieces at a time, and continue to beat until dough is shiny and forms strands from paddle to bowl (the dough will be very soft and sticky).
  3. Scrape dough into a lightly oiled bowl and cover bowl with plastic wrap. Let dough rise in a draft-free place at warm room temperature until doubled in bulk, 1 1/2 to 2 hours (I sit my bowl on top of a big pot filled with hot tap water at the bottom of the pot– just be sure the water doesn’t touch the dough bowl).
  4. Line loaf pan with 2 pieces of parchment paper (1 lengthwise and 1 crosswise), and liner for muffin pans.
  5. Punch down dough with a lightly oiled rubber spatula, then divide the dough into 1/3 (for loaf pan) and 2/3 (for 12 muffin molds) portion.
  6. For loaf pan: Roll out 1/3 of dough on a well-floured surface with a lightly floured rolling pin into a 13×10 inch rectangle, with the long side in front of you. Brush egg wash on the long side farthest from you.
  7. Dust cocoa powder evenly over the dough, leaving a 1/2 inch space all around. Spread remaining 1/3 of the chocolate filling evenly on top of cocoa powder. Starting from the long side nearest to you, roll up the dough tightly like a jelly roll. Pinch firmly along egg-wash side to seal.
  8. Bring ends of log together to form a ring, pinching to seal. Twist entire ring twice to form a double figure 8 and fit into lined loaf pan.
  9. For muffin pans: Roll remaining 2/3 of dough on a well-floured surface with a lightly floured rolling pin into a 15×10 inch rectangle, with the long side in front of you. Brush egg wash on the long side farthest from you.
  10. Dust cocoa powder evenly over the dough, leaving a 1/2 inch space all around. Spread remaining 2/3 of the chocolate filling evenly on top of cocoa powder. Starting from the long side nearest to you, roll up the dough tightly like a jelly roll. Pinch firmly along egg-wash side to seal. Divide dough log into 12 even pieces.
  11. Take a piece of dough, hold it with one hand and twist the dough with the other hand (so it looks like a cinnamon twist). Carefully place the dough into lined muffin mold. Repeat with remaining pieces of dough.
  12. Loosely cover pans with greased plastic wrap (buttered side down) and let babkas rise in a draft-free place at warm room temperature until dough reaches top of pans, 1 to 2 hours. (Alternatively, let dough rise in pans in refrigerator 8 to 12 hours; bring to room temperature, 3 to 4 hours, before baking.)
  13. Put oven rack in middle position and preheat oven to 350°F. Meanwhile, prepare streusel.
  14. Brush tops of dough with remaining egg wash. Scoop some streusel topping on the top. Bake until tops are deep golden brown and bottoms sound hollow when tapped (when loaves are removed from pans), about 35-40 minutes. Transfer loaves to a rack and cool to room temperature (please note muffin pans take a little less time to bake).

Regina’s Note:

  • Bittersweet chocolate: it’s better to use good quality chocolate for this recipe. Also, use a food processor for the chopping– just be sure to freeze the chocolate and blade before chopping.
  • Babka tastes best when warm, reheat in toaster or toaster oven when it is cold.
  • According to Martha Stewart, unbaked babka can be frozen for up to 1 month. After 2nd rise in the pan, wrap the pan with plastic wrap, followed by foil. When ready to bake, remove from freezer; let stand at room temperature for about 5 hours, and bake.
  • Alternatively, this recipe yields 2 loaf pans– I don’t have second loaf pan so I used muffin pans.
Chocolate Babka

Chocolate Babka

Chocolate Babka

Chocolate Babka

Read Full Post »

« Newer Posts - Older Posts »